
1. Lay out the tulle in its entirety. Place the alencon lace carefully around the tulle.
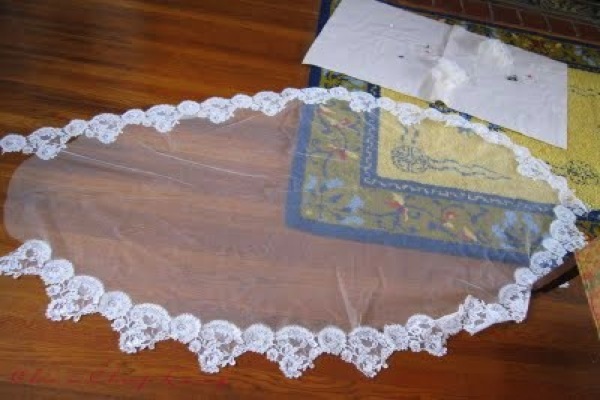
2. Line the lace up to where you want it to end around the front. Mine is 5″ away from the comb lining up with my ear which worked out perfectly.
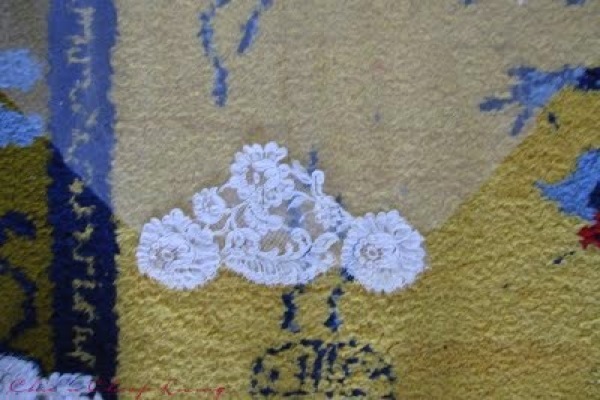
3. If you want a specific pattern at the end, sew that first. I wanted a few more flowers at the end and had to cut my trim accordingly. In addition since alencon lace trim is double faced (flowers face different directions after you cut it) I lined up the same lace accordingly on either side of the veil.
4. Sew the lace to the tulle at the top edges of the trim with a triple knotted double thread. Ensure that the trim covers the tulle and the eyelash fringe is overhanging the tulle. Also ensure your alencon lace is on the right side (corded side is facing outward).
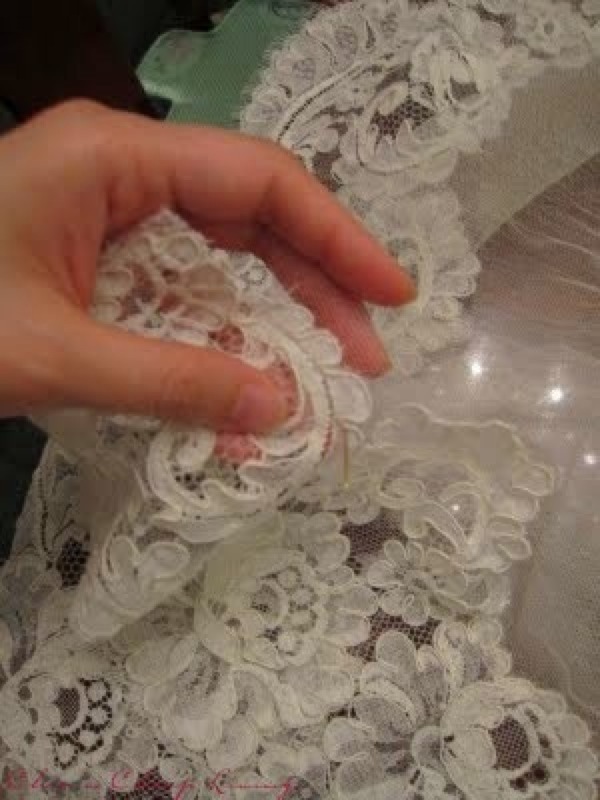
If you ever have to cut a small piece of the pattern, I recommend sewing it to the next piece of trim. This will give the illusion of a continuous pattern and keep the lace from flopping around.
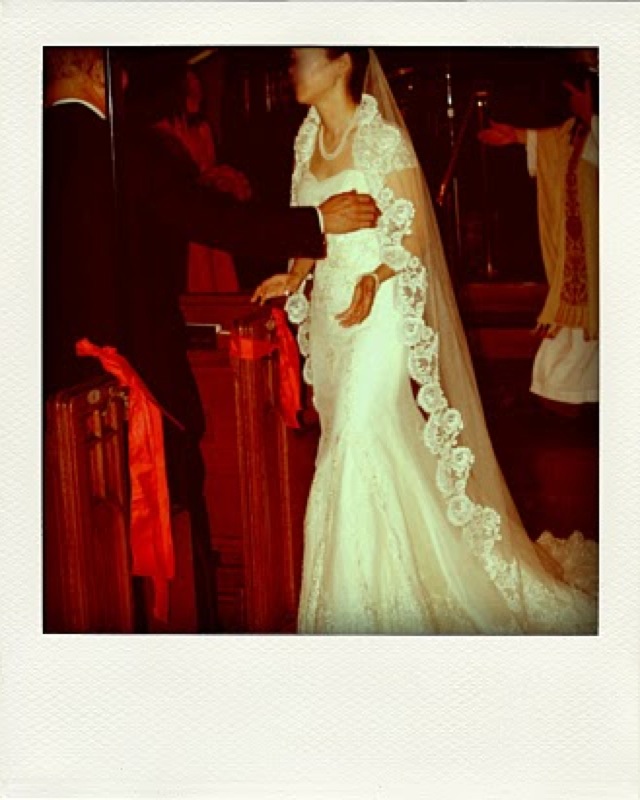
I had a very specific amount of lace to work with. Otherwise my veil would have been a little longer, a full chapel length. Now it’s maybe 76″ so it’s between a waltz and a chapel length.
This also took quite a few hours, especially since I adjusted (i.e. had to rip out the lace with the seam ripper and realign) a few times. I have some extra alencon lace flowers and am wondering if I should sew some in the center. What do you think? It’s hard to take self-modeling shots because the veil doesn’t drape well when I have one hand up? This was the best shot I could take and apologies that it didn’t resize very well.

Chic ‘n Cheap – truly a labor of love and it’s something I will pass to any daughters.
Do you like it? Who else is making her veil?


looks amazing! that lace and how it borders such a beautiful veil shape is divine. great job!
Gorgeous!!
That is a gorgeous veil I love it! You did an amazing job! I also plan to wear a chapel length veil, they are so beautiful 🙂
That lace is freakin’ incredible. Holy crap.
gorgeous!
i made mine, too, lady. only it’s crazy long and has a little blusher. love the mantilla-look tho.
OMG u ROCK! it’s gorgeous!!! i’m sooo impressed!
*Bows down*
It’s gorgeous. Fantastic job!!! Can’t wait to see it in action in your wedding pictures.
I wanted to thank you for stopping by my blog and like you said, we must be blog sisters! Your veil is beautiful and you did a wonderful job on it.
Fantabulous!
Now I want to wear a fabulous long veil made by my fair hands!
Great job!
OMG. I leave for a few days and I miss all this gorgeousness! I’m soooo impressed chicncheap.
Hey!
this looks lovely!
I want to make it but can’t find part 1/ Please help!
Hi Dominique, thanks for you sweet comment. The link for part 1 of making the veil is in the first sentence. I have also included it here:
http://chicncheapliving.blogspot.it/2009/08/diy-how-to-make-your-own-waltzchapel.html?m=1
Hi, are you able to advise where you got your lace trim from? was it trim by the meter or was it fabric by the meter? thx!
Hi Chantelle, I got the lace trim by the meter from a store in New York’s garment district. I would recommend going to a speciality fabric store for lace trim. There are so many beautiful options and it would be much more difficult and time consuming to get an alencon (or any other) lace trim from fabric by the meter. You would also end up wasting a bit of fabric. I hope this helps and let me know if you have more questions, though I made this 5 years ago! Thanks for stopping by the blog !